Monday, November 30, 2009

Ink Stains 2nd Blog Birthday Winners!!!

And the winners of the "Ink Stains ~ 2nd Blog Birthday" Give-A-Way are.....
(in no particular order).....
Miz Amigo ~
mizamigo said...
Two years, happy anniversary! I just found your blog and I love it. I'm coming back again to make sure I get all the info you have here. And thanks for the opportunity to win you give-a-way.
November 26, 2009 10:18 PM
Karen L
Karen L said...
I just love the idea of drawing around the edge with the paint marker! It looks like gold!!
November 27, 2009 8:33 PM
Elaine A
Elaine A said...
Hi Roni -I've had a blast going through all your techniques today. I will be trying quite a few of these. Thank you so much for reposting them.Elaine Allen
November 27, 2009 5:07 PM
Kim
Kim said...
Gorgeous, Roni! The "Waiting for Mr. Right" stamp is in my stash waiting for ink--This may be the technique to try!!! Thanks for sharing!
November 27, 2009 4:35 PM
and
Debb
debb said...
I am so thrilled to see your posts on this! I kept seeing this tool in various blogs and not knowing what it was called, who made it, etc. I kept looking in the Tim Holtz sections thinking it was one of his tools and could never find it. Now I will track one down and try all these fab techniques- I can't wait. Thank you for your wonderful blog and all the knowledge you share- not to mention the wonderful art!
November 28, 2009 8:42 AM
Congratulations Ladies ~
Please e-mail me your snail mail address and please let me know if you prefer not to receive Christmas themed stamps. I have alternates so please don't worry if you want to change.
I want to thank everyone for stopping by and checking out some of the most popular techniques from the past couple years. I hope you had fun checking them out :)
I also want to thank all of the Ink Stains readers out there in Blog-land.
You are the reason why I do what I do here
and I really hope you enjoy it as much as I do!!
(((((((HUGS)))))))
to you all!!

25 Days of Hand Made Ornaments - Day 1 - Lace Snowflake/Star

Woo Hoo!!
25 Days of Hand Made Ornaments is set to begin!!!
Now first I wanted to tell you I never even thought of Tim Holtz's 12 days of Tags when I started thinking about this in October. So, no...I didn't do this to copy him or anything. I actually thought of it while I was looking back at some old Christmas tree photos I ran across while moving things around.

So, now that you know how it came about let's begin...

I wanted to start off with a really striking ornament that is REALLY easy to create.

Lace Snowflake/Star Ornament

To begin you will need the following pattern:


lace snowflake-star 019

You will need to print this out 5-6 times per ornament (5=star, 6=snowflake). You can print this in whatever size you would like just remember that whatever size you print it out your finished ornament will be twice this size. Say for example you print out 2" squares ~ your finished ornament will be approx. 4". I am using 6" squares so they show up better in the example photos so I end up with a whopping big snowflake!

Also, I wanted to mention one other thing before we begin. This ornament looks like it takes a long time to make but once you get going it doesn't take long at all. I chose to ink and stamp my cardstock. You could cut your time way down by simply printing the pattern on pattern papers. Just a thought if you're short on time but still would like to make them.

Supplies:

Pattern

Cardstock (plain white or pattern paper)

Ink Blending Tool

Distress Inks

Archival Inks

Rubber Stamps

Exacto Knife

Glue Dots

Thread/Ribbon (for hanger)

Instructions:

1. Print out 5 or 6 of the squares on cardstock if you plan on decorating it yourself or pattern paper for the quick version. I printed the pattern out at 50% tint so it wouldn't show up as well on the finished ornament.

lace snowflake-star 001

2. Ink the unprinted side with a light color ink and the printed side with a dark colored ink. The contrast of light and dark make for a more striking finished ornament.

lace snowflake-star 003

3. Stamp both sides of the cardstock. For mine I used two different colors of ink as well as two different stamps.

lace snowflake-star 004

4. Using the exacto knife, cut along all of the dotted lines on all of the squares. Now, these lines don't have to be perfectly straight or anything so you don't have to worry about perfect cuts. I just used the exacto knife like a pencil and traced over the lines.

lace snowflake-star 005

lace snowflake-star 006

5. Fold both of the the center flaps up ~ place a glue dot on one side and secure the second flap to the first as shown.

lace snowflake-star 007

6. Flip the cardstock over and fold the second set of flaps over, add a glue dot and secure.

lace snowflake-star 009

lace snowflake-star 010

7. Continue alternating sides, securing each set of flaps to each other until you have finished each set. It should look like this...

lace snowflake-star 008

8. Repeat with the remaining 4 or 5 squares.

lace snowflake-star 011

9. Now it is time to assemble the star or snowflake. Place a glue dot at the two points shown in the following images....the point and the center -

lace snowflake-star 012

lace snowflake-star 013

10. Place the next section of your star/snowflake beside the first and secure with the Glue Dots.

lace snowflake-star 014

11. Continue adding sections until you have added the remaining sections.

Here is what the 5 section star will look like.....

lace snowflake-star 015

and here is the 6 section snowflake....

lace snowflake-star 020

Now of course you can dress this up in all sorts of ways...

-try embossing the stamped images with a tinsel or glitter embossing powder.

-use a variety of inks to tint the background.

-instead of inks, mist the squares with Color Wash or Glimmer Mist.

-apply Stickles Glitter Glue or Dimensional Pearls for added sparkle and shine.

-add a vintage image to the center of each star or snowflake.

-use twine, raffia, ribbon, gold thread, etc. for the hanger.

-transfer the pattern onto vintage sheet music or pattern paper.

So there you go,

Hand-Made Ornament #1 ready

and set to go!

Be sure to check in tomorrow for Ornament #2!

See you then!!

Sunday, November 29, 2009

Sunday Poscard Time!!

Today I have some VERY old postcards (pre WWI) from France... Le Havre France to be exact! You can click on the name and it will take you to a site with current info about this area. Sure looks different than the postcards!!

Enjoy

Le Havre France

postcards 112909 001

postcards 112909 002

postcards 112909 003

postcards 112909 005

postcards 112909 006

postcards 112909 007

Be sure to tune in tomorrow, I'll be posting the Ink Stains Blog Birthday winners

and

this week is also when I'll start sharing my 25 days of ornaments!!

Yep, that's right 25 different techniques for creating unique and beautiful hand made ornaments for gifts or for keeps :)

See you then!!

Friday, November 27, 2009

Ink Blending Tool

I'm sure most of you know that my favorite tool is the Ink Blending Tool & Foams!

I absolutely LOVE LOVE LOVE this critter and don't know what I did without it.

Over a couple weeks in early '08 I posted my Favorite Top 10 IBT techniques along with loads of examples.

People still ask me about these techniques and view them over and over.

Enjoy!!

Ink Blending Tool Techniques


Gloss & Glitter

My next technique I wanted to share with you came about because I was having such difficulty finding Future Floor Wax. You know me, I love to experiment and I knew I could figure out SOMETHING to take the place of the floor wax with similar results.

Remember, you can click on the title below to take you to the original post which contains all of the step-by-step photos and finished examples!

and

Any posts on this thread will enter you for a chance to win a set of mini stamps and blank cards!!


(Originally posted March 5th, 2008)
Faux Floor Wax Technique 012

Here is a scrapbook safe alternative to the Future Floor Wax technique. Substitute Glossy Accents in the place of floor wax!! It's acid free, non-toxic and dries to a clear shine. The same great look without all the unknown chemicals found in floor wax products.
A few things before we get going...this could be a messy technique. I say "could be" because I tend to get a bit wild with techniques like this and the fur flies so to speak ;) I always make a mess so I like to use the Non-Stick Craft Sheet from Ranger. It is a non-porous sheet that helps protect your work surface. It also wipes clean when you're through so it helps to make clean up VERY easy.
Another item you might consider is a pair of rubber gloves or disposable foam brush. I personally don't use either ~ I like to dig right in! The blog isn't called "Ink Stains" for nothin - LOL!!! I walk around with ink stained, some would say - ugly, fingers much of the time. It doesn't bother me...it's sort of a badge of honor.... "I got inky with it today!" sort of thing ;) Gloves or not....it's totally up to you!

Now, let's get down to it.....

Supplies:

Glossy Accents - Ranger

Stickles Glitter Glue - Ranger

Ice Stickles Glitter Glue - Ranger

Perfect Pearls Pigment Powders - Ranger

Re-Inkers (Adirondack, Distress, Nick Bantock), Adirondack Alcohol Inks ,

Archival Ink - Jet Black - Ranger
Beadazzles - Ranger

Acetate (transparencies) - Office Supply Store

Rubber Stamps

Tissue Paper (crumbled)

Instructions:
1. Stamp image onto transparency using Archival Ink.

2. Flip transparency over. You will be working on the back side of the image for this technique.

3. Squirt a generous amount of both Glossy Accents over the entire image.

4. *Optional* - At this point you have the option of adding a bit of dimension to your finished work. You may add Stickles Glitter Glue, Ice Stickles Glitter Glue, Perfect Pearls Pigment Powders, Beadazzles, mica flakes, micro beads, or glitter! It's fun to experiment with various add-ins to see what you come up with.
5. Spread and mix the Glossy Accents and optional additive over the entire back of the image. Make sure you extend the Glossy Accents a bit beyond the actual image. You want to be sure you will have adequate coverage for the next step.

6. Crumble the tissue paper gently.

7. Lay the tissue paper over the Glossy Accents mixture and pat gently making sure that the entire piece has been pressed into the GA.

8. Apply another layer of Glossy Accents over the tissue paper.

9. Add a few drops of re-inker or alcohol ink to the Glossy Accents.

NOTE: You don't need much, a little goes a long way!!! You will have to experiment with whatever type of ink you are using. Some inks have a far more intense color saturation than others. I would add one or two drops of ink to begin with then add more if necessary. It will dry a bit lighter than what you see but not much. It is very important to keep this
in mind when adding the inks....trust me, you can over-do ;) I got a little ink happy and added WAY too much on a couple of my pieces. The colors are amazing but you can't see the stamped image in the end!
10. Spread the Glossy Accents & Ink over the entire piece. Let Dry!

Note: Dry times vary but I like to let mine dry over night just to be sure that all of the layers have dried completely.

11. Trim and add to a card, scrapbook page, journal, altered art work :)

I also had a few additional examples here - Gloss & Glitter Continued.

Color Sticks Techniques

This is a fun little technique I made up after seeing a quilting technique which incorporates a nice array of colorful fabrics. Remember, you can click on the title link below to see the original post along with all of the photos and examples.


(Originally posted 2-13-2008)

Today I wanted to share with you a technique I call "Color Sticks". It's my own twist on the technique known as "bargello". Basically, bargello is slicing a piece of pattern paper or a stamped image into several pieces then layering these individual pieces in a stair-step fashion.
Color Sticks takes it a step further with the magic of Alcohol Inks! One of my absolute favorite color mediums, you will see what a striking effect the inks have on the finished cards :)

Supplies:
Adirondack Alcohol Inks - Ranger
Adirondack Alcohol Ink Blending Tool & Felts - Ranger
Non-Stick Craft Mat - Ranger
Glossy Cardstock - Ranger
Glue Stick
Cardstock
Trimmer
Instructions:
1. Trim several pieces of glossy cardstock in various widths. Why cut first? Well I do it this way so there is no waste. If you ink a solid section of glossy cardstock you may end up with excess for your particular project. This way, there is no waste! You ink only what is needed and don't end up with a pile of already inked cardstock you have to find a use for.
2. Apply alcohol inks to the strips of glossy cardstock. For this example I used Butterscotch, Lettuce and Stream.
3. On a plain piece of cardstock, apply a generous amount of glue stick adhesive. I know I know, glue stick? Yes...I like to use a glue stick for this particular step rather than other adhesives because you will need to be sure that the entire length of each strip is secured to the backing cardstock. If the entire strip is not adhered to the backing paper it will cause problems when it comes time to cut.
4. Once you have applied the glue stick to the backing paper, start laying the individual strips down. You need to make sure that they are butted snugly next to each other leaving no spaces.
Once you have attached all of your strips to the backing paper you will be left with something that looks like this. It needs to be set aside to dry completely.
NOTE: I like to place a few books on top of the piece while it's drying to ensure there is no curling or warping of the finished piece.
5. Now you are ready to make your "Color Sticks"! Simply slice your creation in various widths ~ everything from very thin to wider pieces will work. You just want to make sure you have lots of sizes to choose from. You will be left with a pile of Color Sticks like this! You may be asking ... now what?


For the finished examples and step-by-step photos be sure to check out the original post - Color Sticks.

Shrinky Dink Wing Glass Charms

I originally posted these Wine Glass Charms - December 26th 2007. Just like then, they are a fun, inexpensive and easy way to help keep beverages from getting mixed up at parties and functions!

Wine Glass Charm 2

Here is a fun and timely little project that will satisfy your inky craving while avoiding the guilty feelings of "Oh, I should really be doing...". Why you might ask? Well, they are not only inky fun but they are practical and useful as well.

Shrink Plastic Wine Glass Charms!

They can be given as hostess gifts or used at your own parties and come in perfect time for all of your New Year's parties you may be hitting in a few days.

These little gems are fairly quick to make, use a few supplies which you may already have on hand and can be personalized by using any stamps you have in your arsenal!

Supplies Needed:

Rubber Stamps (Image in the example is from B-Line Designs)

Ranger Adirondack Alcohol Inks

Ranger Adirondack Metal Mixatives

Ranger Archival Ink (Jet Black)

Ranger Posh Accent Pen

Grafix Shrink Film - Clear

Sizzix Large Dog Tag Die

Hoop Earring or Wine Glass Charm Findings

Jump Rings

Beads

Instructions:

1. Begin by cutting several tags from the shrink material using the Sizzix large size Dog Tag die. I used 8 for this set but you can make as many as needed.

2. Stamp desired image (images) onto the tags using Archival Ink. You may use the same image on each of the tags as I did or mix it up.

3. *Shrink the tags according to mfg. recommendations.

4. Place the tags on the Non-Stick Craft sheet. You will flip your tags over so that side that has not been stamp is facing up. This is the side that you will add apply the alcohol inks on.

5. Apply Alcohol Inks in desired color combinations on each tag. For this example I used Cranberry, Butterscotch, Terra Cotta, Pesto, Denim & Wild Plum. You may also apply a Metal Mixative as well. I used the Silver Metal Mixative with each color.

6. Once all of the tags have been colored with the Alcohol Ink, use the Posh Accent Pen to highlight the edges and tag hole. Set aside to dry.

7. Add beads to the wire findings.

8. Using a jump ring, attach the shrink material charms to the beaded findings.

You're done!
It's time to give them a test run ;)

Happy Birthday Ink Stains!!

Woo Hoo!!

Hard to believe it's been 2 years already but it has.

When I started this blog it was to share techniques, projects and card ideas with friends but it has turned into so much more! I have enjoyed making friends and getting to know you and I hope you've all had a good time!

Thanks to everyone who stops by!!!!

You're the reason I do what I do :)

I thought I would celebrate today by posting the most popular techniques and projects from the past two years. These are the posts that drew much attention at the time and are continually the most viewed on a regular basis.

Hope you enjoy them!!

Now for the fun part...

Post a comment on any of the various threads today and you'll be entered to win!

I am giving away a mini set of stamps (let me know if you'd prefer not to get Christmas stamps) and 10 cards & envies to get you going!

You have until Sunday (11-29) to post a comment at which time I'll draw the names of the winners (using Random.org).

Good Luck Everyone

&

Thanks Friends for your Support!!

Thursday, November 26, 2009

Black Friday On-Line Specials!

Hey Everyone!

I hope you're having a wonderful day with family and friends and not eating "too" much ;)

I thought I'd share some of the on-line sales I've gotten notifications of over the last few days. I know it's time to buy for others but it never hurts to sneak in a bit for yourself as well!

Here you go...


YOU WON'T BELIEVE YOUR PERFECT PIGMENT COLOR - FILLED EYES!
IT'S AN ONLINE ONLY - HALF-OFF SPECIAL!

Take 50% off your
New Complete Paint Kit in Tin!
Black Friday Special begins early!
Starting Thanksgiving Day, ending at Saturday midnight

Your Price: only $75.00
Reg. $149.95


That's 23 - 1 oz. colors, 1 - 4 oz White, 1 - 4oz Perfect Glaze, Studio Paper, Studio Cloth, Brushes, Sponges, directions, and more! It comes in our beautiful windowed, reusable tin! Great for gifting and even better for getting!

Alluring Impressions


Alluring Impressions wants to show gratitude to each and every one of you who has supported our small, family owned business since 2006.
We have just launched our new website, and to thank each and everyone of you, we would like to offer 20% off your entire purchase now through Monday, November 30.
Just enter the coupon code THANKS09 at checkout and your discount will be applied to your order.
http://www.alluringimpressions.com/


Enjoy this time with your family and friends, and remember the things in your life that make you grateful.
Happy Thanksgiving!

Amy Erickson
Alluring Impressions


HappyNScrappin


Coupon Code: take15more

Details: SAVE an additional 15% ON YOUR ENTIRE PURCHASE on top of our already low prices!!!! (YES, this includes clearance section!!!!!!)

In stock product only; gift cards excluded

Coupon Code: cookbookb1g1

Details: Buy 1 cookbook, get one free

Another Darn Cookbook!!

Coupon Code: freeshiptoday

Details: USA orders over 35.00 ship free; fashion furnishings excluded

Coupon Code: fashion25

Details: Take an additional 35% off the entire Doodlebug Fashion Furnishings Line (will be 45% OFF as the products are already 15% off)

Coupon Code: slice50

Details: Get a Slice Starter Kit for 50.00 off
(FIRST 5 CUSTOMERS ONLY)

Slice Starter Kits

Coupon Code: slice15

Details: Take $15.00 off any slice design card

Slice Design Cards

EARLY BIRD SPECIAL!!!!

Place your order before 12:00 NOON AZ time and get free product added to your order!! We have BOXES of free goodies to add to ALL orders received prior to noon!!


Hambly Studio

Black Friday Specials

For the first time ever we are offering 30% off your entire order and free shipping* at the online store. Please enter coupon code BLACKFRIDAY at checkout, valid Nov. 27th only. This is a great way to get some fun stocking stuffers like our notepads, the new Wall Decals, or some of the new Rub-Ons you've been eyeing.
Promo code required. Free shipping for U.S. addresses only. Calendars excluded from free shipping.


Just for Fun Stamps

DON'T MISS THE 48 HOUR THANKSGIVING DAY-BLACK FRIDAY SALE SPECIAL!

From 12:00 midnight Thanksgiving Day until 12:00 midnight Saturday 11-28
you will receive 25% OFF all online retail purchases. www.jffstamps.com

Orders will begin shipping December 4, 2009.


Viva Las Vegastamps


BLACK FRIDAY SPECIALS!
Happy Thanksgiving everyone... Viva Las Vegastamps! is offering some great specials for you to celebrate... just order them online at Viva Las Vegastamps!
1. Black Friday Grab Bag... $100 worth of stamping/scrapping accessories for just $29.95! Great for using yourself or gifting to others for Christmas or any excuse at all... your package could include punches, stamp pads, re-inkers, pens, embellishments, polymer clay tools... anything craftsy.
2. Monograms... two letters of your choice (if available)... regular price is $6.95... Black Friday price just $1.74... if you pay by PayPal and your initials are not available, we'll refund the price to you... if paying by Credit Card, we'll only charge for this if we have your initials in stock... these are no longer available so what we have is what we have and we need to make room for more new stamps!
3. Miracle Tape Sampler... all six widths of our 165-foot Miracle Tape (including the new one-inch width), two tape dispensers and a three-pack of Miracle Tape sheets... regular value $50.01... Black Friday price just $37.77!
4. Sheets O' Rubber... buy any two Sheets O' Rubber at $21.95 each and receive third sheet FREE... just specify which sheets you want in Comments after adding as many of these specials as you want to your cart.
5. Pound O' Rubber... Buy a Big Whopper Pound O' Rubber for $25 and receive a Pint O' Ultra Gloss Embossing Powder (a $19.95 value) for just $2.95!
All Black Friday Specials are listed at VLVS! HomePage and are good through midnight Cyber Monday, November 30th. Shipping and handling charges will be added at checkout. Please tell your friends!


Hannah Grey

Starting Thanksgiving day through Black Friday (or until we run out) spend $50 or more (before tax and shipping) and receive FREE GOODIES worth $30 or more! Just enter the code GOODIES at check out. Does not apply to previous orders, or orders placed without the coupon code.

http://www.shop.hannahgrey.com/


Schmooze with Suze

today through November 29th we are having a
20% off everything sale.
what more is there to say ??!! Just type in the code
GIVETHANKS
when you place your online order.


Happy Shopping Everyone!!!

Wednesday, November 25, 2009

Happy Thanksgiving Everyone!!

I hope you all have a safe and happy Thanksgiving!

give thanks card

If you're not busy on Friday be sure and stop by to help me celebrate

Ink Stains 2nd Birthday!!

It snuck up on my this year (because of the holiday).

I'll be sharing some of the most popular projects and techniques I've posted over these last two years (in case you missed them the first time around).

I'll also have several chances to win mini rubber stamp sets and cards to go with :)

Take care everyone ~

and hope to see you then!

Tuesday, November 24, 2009

EASY Painted Sticky Back Canvas Sunflower!

I've had several requests for more projects using the Sticky Backed Canvas from Ranger so here is an EASY (honestly) painted Sticky Back Canvas project. You don't even have to be a whiz at painting!


EASY Sticky Back Canvas Sunflower


Roni - CHA 037


Supplies:


Sticky Back Canvas


Adirondack Acrylic Dabber


Ink Blending Tool


Inkssentials White Pen


Cinnamon Stickles


Black Pen


Oval Die-Cutter or Scissors


Instructions:


Background -


To create the background I took advantage of the color trios in the Adirondack Acrylic Dabber line of paints.


1. Cut the canvas to the desired size ~ this project is 5 1/2 x 8 1/2 but you could make this any size you like.


2. Begin with the sky. I used Denim, Sail Boat Blue and Cloudy Blue. Dab the Denim in a straight line across the very top of the canvas, next dab the Sail Boat Blue under the Denim line of paint. Finally dab the Cloudy Blue closest to where the grass will be.


3. Dampen the Ink Blending Foam with water...it doesn't have to be dripping wet, just damp. Begin with the Cloudy Blue paint and begin working the paint around covering all of the canvas. Gradually blend with the Sail Boat Blue, working your way up towards the top of the canvas. This will give you the nice blended effect of the sky.


4. Repeat the paint dabbing process for the grass area using Lettuce, Citrus and Willow.


5. Blend the paints in the same fashion as in step number 3 working from light to dark. Set aside and let dry.


6. Once the canvas is dry, remove the backing paper and adhere it to a sturdy piece of chipboard. Set aside.


Painting the Sunflower Parts


1. You will need to cut 6 large ovals and 2 small ovals. Cut a 1/2" strip of canvas 5" long.


2. Paint 3 of the large ovals using Lemonade Acrylic Dabber.


3. Paint 2 of the large ovals using Butterscotch Acrylic Dabber.


4. Paint the remaining large oval using Espresso Acrylic Dabber.


5. Paint the 2 small ovals using Citrus Acrylic Dabber.


6. Paint the stem using Lettuce Acrylic Dabber.


Let all of these pieces dry.


7. Stamp flowers on the yellow ovals using the opposite colors of paint (Lemonade Ovals - stamped w/Butterscotch, Butterscotch Ovals stamped w/Lemonade) and stamp the small Citrus ovals with Willow paint.


Roni - CHA 037


Roni - CHA 037


Assembling the Flower


1. Remove the backing paper from the stem and place it on the dry painted canvas background.


2. Begin adding petals starting with the center petal that over laps the stem. Add the two outside petals.


3. Apply the Butterscotch petals over the Lemonade petals.


4. Finally top the flower off with the Espresso flower center. Add dots of Cinnamon Stickles to the flower center.


Roni - CHA 037


5. Add the two smaller leaves to the stem.


6. Add pen work details to the edges of the flower petals, stem and leaves.


7. (optional) I added Black Soot Distress Ink to the edges of the canvas just for the fun of it. I think it gives it a nice finished look.


So, there you go ~ another fun and very easy way to create a cool looking painted canvas without having to know how to paint like a pro!

Monday, November 23, 2009

Southern Blackberry Design - Trans Maxx - Transfer "Skin"

Here is a great new product from Southern Blackberry Designs ~ Trans Maxx! It's a super transfer medium and glue to help you create a perfect image transfer every time!!

Now you can use Trans Maxx using the traditional method for image transfers but I find that I like to use this transfer medium to make image transfer "skins". An image transfer skin is basically just the transfer medium and the image.

You can then apply these "skins" wherever you like without the buckling and wrinkles normally associated with the extra layers of transfer medium from traditional image transfer methods. This works especially well for cards, scrapbooks, ATC's, clear glass items and more These skins of course can still be applied to the more traditional items.

If you have the opportunity you might look into SBD's Tissue Decoupage Collage Sheets. They make image transfers much easier because the images are printed on a very thin special paper which can be removed quickly and easily with far less "fuzzies" you normally get with most image transfer techniques.

And you know me ~ ever experimenting ~ I tried it with ink jet images and IT WORKED!!!

Trans Maxx Image Transfer Skins

SBD Transfer Skin 001

Supplies:

Trans Maxx Image Transfer Medium

Collage Image

Brush or Finger (to apply the medium)

Water

Something to apply your Transfer to

Instructions:

1. Trim the desired image you wish to transfer and apply a coat of Trans Maxx image transfer medium. You can use a brush but I like to use my finger (as you know - lol!). Let the image dry. It usually takes about 45 minutes - 1 hour to dry completely depending on temperature and humidity variations.

SBD Transfer Skin 005

2. Once the first layer has dried, apply a second coat of Trans Maxx & let dry.

3. Apply a third and final layer of the Trans Maxx and once again, let it dry completely.

SBD Transfer Skin 003

4. After the third layer has dried completely ~ flip the image over and wet the image thoroughly and let it set for 5-10 minutes.

SBD Transfer Skin 006

5. Rub the paper off the image as with a normal image transfer. If you are using the tissue decoupage images you will notice the paper almost slides off the image it's so easy to remove. Continue rubbing until the image is revealed.

SBD Transfer Skin 008

6. You'll be left with the image transfer "skin". Blot the excess water off the image and it's ready to be applied to your project. Remember this image will be delicate so handle it accordingly.

I usually just add a dab of transfer medium to the back side of the image to attach it to my project.

If as shown in the example I'm going to be using it for a glass slide (Memory Glass) pendant I don't even add extra transfer medium. The "sandwich" of glass will hold the image in place.

SBD Transfer Skin 009

7. Finish the Memory Glass Pendant by trimming text, cardstock or pattern paper to back the image.

SBD Transfer Skin 007

8. Don't forget to add extra "bits" to the back of the pendant because you may see that side too from time to time.

SBD Transfer Skin 010

9. Slip the glass slide "sandwich" into the Memory Glass Frame and close the little tab...and you're done!

Isn't it amazing how cool the image looks with the text behind it? The best part of using the Image Transfer Skin is there is no glue or adhesive to alter the color, look or feel of the vintage text paper.

SBD Transfer Skin 014

SBD Transfer Skin 013

Here are two additional examples using the Image Transfer Skins...

The eggs on this ATC are ITSkins made from ink jet printer images.

SBD Transfer Skin 020

The domino was colored using Alcohol Inks, after it was dry the ITSkin was applied to the domino. You can see how nicely the wet image transfer skin folds around for nice clean edges.

SBD Transfer Skin 016

Pretty cool huh??

So, do you think you'd like to give either traditional image transfers or the "skins" a try?

Well you're in luck!

Just post a comment here and you'll be entered for a chance to win a trio of Southern Blackberry Designs decoupage/collage sheets AND your own bottle of Trans Maxx!!

If you'd like an extra entry in the drawing, post your favorite decoupage/collage sheet(s)!!

You'll have until December 1st to post your comments and favorite(s) at which time I'll draw one lucky winner from all the entries (using Random.org).

Good Luck Everyone!!!

Sunday, November 22, 2009

Postcard Sunday....More Vintage Turkey Served Up!!

I know, I posted some Turkey day postcards last week but well...I couldn't resist. There are just soooo many cool vintage Thanksgiving related postcards to share I am posting more this week.

Enjoy!

Peace & Prosperity

tg3

Thanksgiving Greetings

(Dinner)

tg4

Good Wishes

(Girl & Turkey)

tg5

A Happy Thanksgiving

(Large Turkey)

tg6

With Thanksgiving Greeting

(Girl feeding Turkey)

tg7

Singing Turkeys

tg8

Turkey & Tea Cup

thanks

Turkey w/ Veggies

thanks 2

Tomorrow I have a fun technique planned ~ a Tranx Maxx Transfer "Skin". I know you're going to love it!

Then later in the week I'll be sharing more inky goodness along with a special celebration on Friday ~ Ink Stains 2 year B-day!!!

Be sure to stop in and check it all out!

Friday, November 20, 2009

Tim Holtz Rock Candy vs. Inkssentials Crackle Accents

Lots of people have asked what the difference is between Tim Holtz Distress Crackle Paint - Clear Rock Candy vs. Inkssentials Crackle Accents so I thought I'd share what I found as I compared the two side by side.

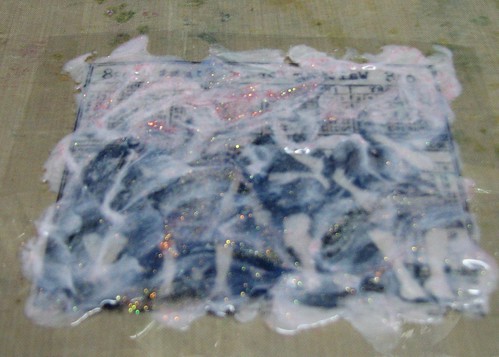
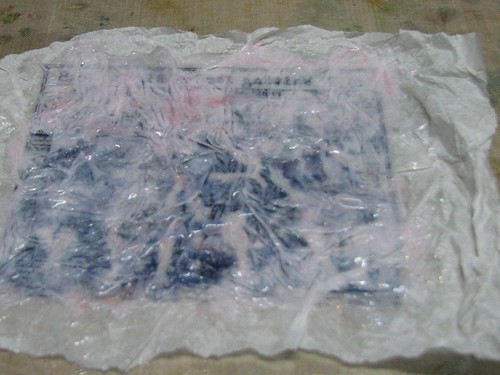
I decided to work with two images...images that most of us would use quite often...the first an ink-jet printed image on a normal weight copy/print paper. Everyday, nothing special just plain old paper. The second is a laser printed image on a glossy cardstock. This is the type of image you would get if you purchased collage sheets from various companies on-line or in kits.

I applied both products to each image, I'm not telling you just yet which side was which because I want you to look at the results w/o bias.

There are lots of photos of each image with different light variations and angles so here you go...

I'll tell you which side is which and my own personal findings about each below.

Image #1 -

Ink Jet Printer/Plain Copy Paper

Rock Candy vs Crackle Accents 001

Rock Candy vs Crackle Accents 004

Rock Candy vs Crackle Accents 009

Rock Candy vs Crackle Accents 010

Rock Candy vs Crackle Accents 011

Image #2

Laser Printed / Glossy Cardstock

Rock Candy vs Crackle Accents 002

Rock Candy vs Crackle Accents 006

Rock Candy vs Crackle Accents 006

Rock Candy vs Crackle Accents 007

NOW, what did you think?

Which side do you think is the Rock Candy

and which is the Crackle Accents???

Well

...

...

...

The left side of both images is the Tim Holtz Distress Crackle Paint - Rock Candy, the right side is Inkssentials Crackle Accents!

Did you guess it right?

Now some of my observations...

Over - All Appearance

At first glance both products look similar ~ nice crackles over the entire surface.

When you look closer you will notice that the Rock Candy yields a wide variety of chip sizes while the Crackle Accents has a bit of variety, not nearly as much as the RC. I believe this is due to the fact that you can control the Rock Candy coverage a bit better than the Crackle Accents.

Why? - Well you actually paint on the Rock Candy and can control the depth of the material better thank you can with the Crackle Accents.

Crackle Accents is self-leveling which means it will basically over time even the coat/coverage out as it dries giving you an nice flat, glass like surface. This is perfect when you're making charms and pendants but not so cool if you want a bit of variation on your finished look.

Rock Candy on the other hand does smooth out a bit hiding some of the brush stroke lines but it doesn't level out to the point of being a flat finished surface. It retains the various high and low spots as it was applied. Now, of course if you apply it in a very even coat your results will reflect that.

A HUGE difference and something very important in my book is DRY TIME!! I let both products dry naturally (more on that below).

The Rock Candy started crackling within minutes. The majority of the RC was dry in 20 minutes, the higher, thicker areas were dry within the hour.

Crackle Accents takes MUCH longer to dry ~ It was 2 hours before I started getting cracks along the edges and I had to let it set over night for the thicker areas to completely dry. I would say at least a good 8-10 hours for it to dry completely.

Now I mentioned I let both dry naturally ~ the coolest thing about Rock Candy ~ you can actually speed the dry time with a heat gun!!! As soon as you notice the Rock Candy starting to crackle you can begin gently heating it. You could cut the total dry time down immensely by doing so.

I personally wouldn't heat the Crackle Accents with a heat gun...it will begin to bubble and create a huge cloudy mess ~ the longer you heat it, the more numerous the bubbles so instead of being clear it gives it a milky finish.

Curling...

One issue that we all face with products like this is curling while it dries. You're not going to get away from this unless you adhere the image down to a very thick surface - wood, heavy duty chipboard, etc. If attached to a layer of cardstock or pattern paper for example it will curl those as well which is why I always let my image dry before I attach it to my project.

I think the Rock Candy curled a bit less than the Crackle Accents but it's the nature of the beast so you're never going to get rid of it completely.

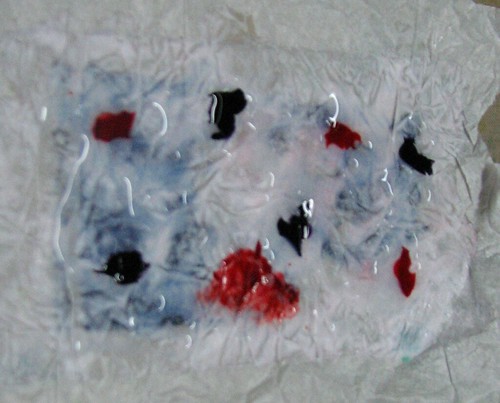
Additional Observations...

There were a couple other things I noticed when I was using both products.

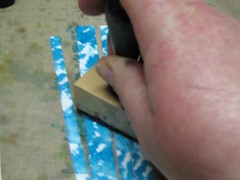
*First, Rock Candy flaked off a bit when I was flattening it out and attaching it to the blue cardstock. I kind of like that because it just adds to the distressed feel of the image.

When I tried to scrape additional bits off (to distress it more) the Rock Candy came away w/o damaging either image. The Crackle Accents came off very difficultly and tore away bits of the image so I wouldn't suggest it.

*Another thing I noticed was concerning coverage. If you've ever worked with Crackle Accents you know how very thick it is. It is very time consuming trying to squeeze enough of the product out to cover very large areas. I usually end up taking the cap off and pouring it out if I'm working on large projects. The Rock Candy on the other hand was very easy to apply...it's thin enough to glide over your project and cover the image quickly and completely.

*Finally cost...Rock Candy can be found most generally in the $3.00-5.00 range depending on where you purchase it. Crackle Accents on the other hand is usually $5.00-7.00 range.

So there you go...

I find that each product works great for specific uses~

Crackle Accents excellent for charms & pendants or small images while Distress Crackle Paint - Rock Candy works best on collage & stamped images, ephemera, collage & altered art projects of any size.

Hope this has helped to answer some of your questions about these two similar yet very different products!